Your First Week with Amavit: A Checklist for Abacus Teachers
When a teacher joins a new educational platform, the biggest problem is usually not the number of features. The real problem is much simpler:
Where should I start?
You can open dozens of sections. Explore settings. Look at analytics. Try different exercises. And still, after thirty minutes, fail to do the one thing that really matters: add your first real student and assign their first real practice.
That is why the first week with Amavit should not be about learning the entire platform. At the beginning, the teacher only needs to complete one simple cycle: add one real student, assign one real task, review the result, and decide what the student should do next.
Everything else can come later.
The best way to start with Amavit is not to explore every feature. Add one real student, assign one familiar task, review the result and use that result to make the next teaching decision. Once this workflow is clear, gradually add more students and groups.
- Day 1 add one student
- Day 2 assign one real task
- Day 3 review the result
- Day 4 adjust one variable
- Day 5 add another student
- Next move one real group
Start small. Learn from real use. Scale only when the workflow is clear.
Do not try to learn the whole platform before you begin
This is one of the most common mistakes when trying any new system. A teacher thinks:
“First I need to understand everything, and only then I can invite students.”
You do not. If you already know how to teach mental arithmetic, you do not need to become an Amavit expert before using it. Your methodology stays yours. The platform is a tool.
So the first question should not be:
“What features does Amavit have?”
It should be:
“How can I use Amavit to give one of my students the kind of practice I already use in my teaching?”
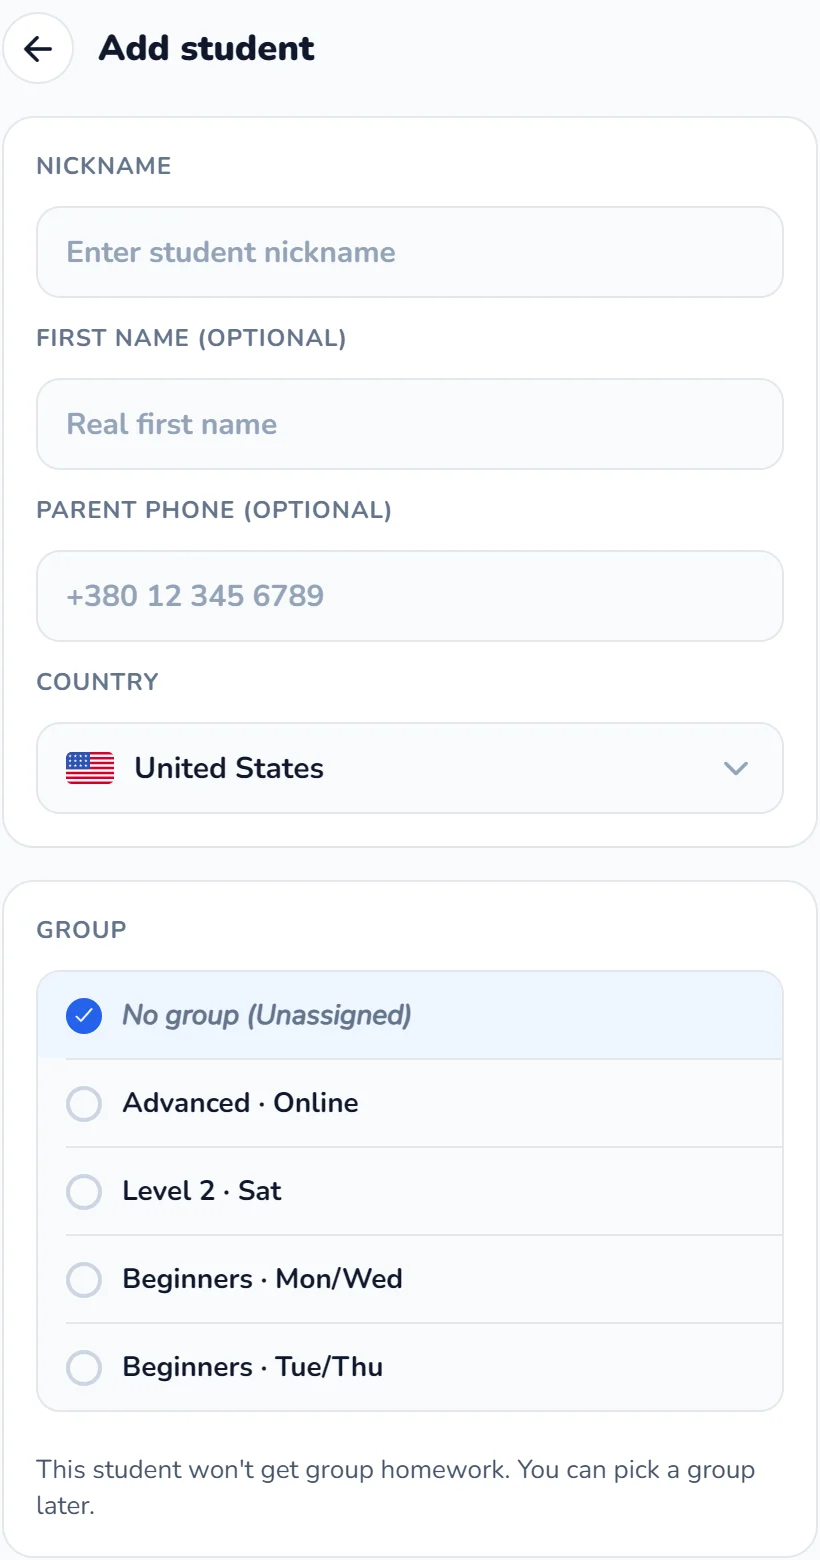
Day 1: Start with one student, not your entire academy
Keep the first step as simple as possible. One teacher. One group. One student.
Do not try to move your entire school into the system on the first day. Even if you teach 50 or 100 students, start with one child. This allows you to understand calmly:
- how the student joins;
- what the student sees;
- how the assignment is received;
- how the practice is completed;
- how the result comes back to you.
If that cycle is clear, scaling becomes much easier.
Choose a student you already know well
For the first test, it is better not to choose a completely new student. Choose someone whose level you already understand. You know:
- their current topic;
- their approximate speed;
- their strong areas;
- their weak areas.
That way, after the practice, you can evaluate not only “The platform showed me a result.” You can also ask:
“Does this result match what I already know about this student?”
That comparison is much more useful.
The first test should not be difficult
Do not begin with advanced Anzan, maximum speed, five-digit numbers, very long chains or all topics mixed together.
Start with something the child already knows. For example: a familiar topic; a normal homework task; a simple review exercise.
The first test is mainly about checking the workflow. Did the student receive the task? Did they understand what to do? Did they complete it? Did you receive the result?
That is enough for the first step.
Day 2: Assign the first real homework task
Now stop treating Amavit as a demonstration. Use it as part of your real teaching.
Choose something you would genuinely assign to this student even if Amavit did not exist. This is important. You do not need to invent a special “Amavit task.”
The platform should fit into your methodology. Your methodology should not be rebuilt around the platform.
If the child is currently consolidating a specific Friend rule, practise that. If the child is working on speed, assign speed practice. If the child needs revision, assign revision. Our guide to assigning abacus homework covers how to choose the task itself.
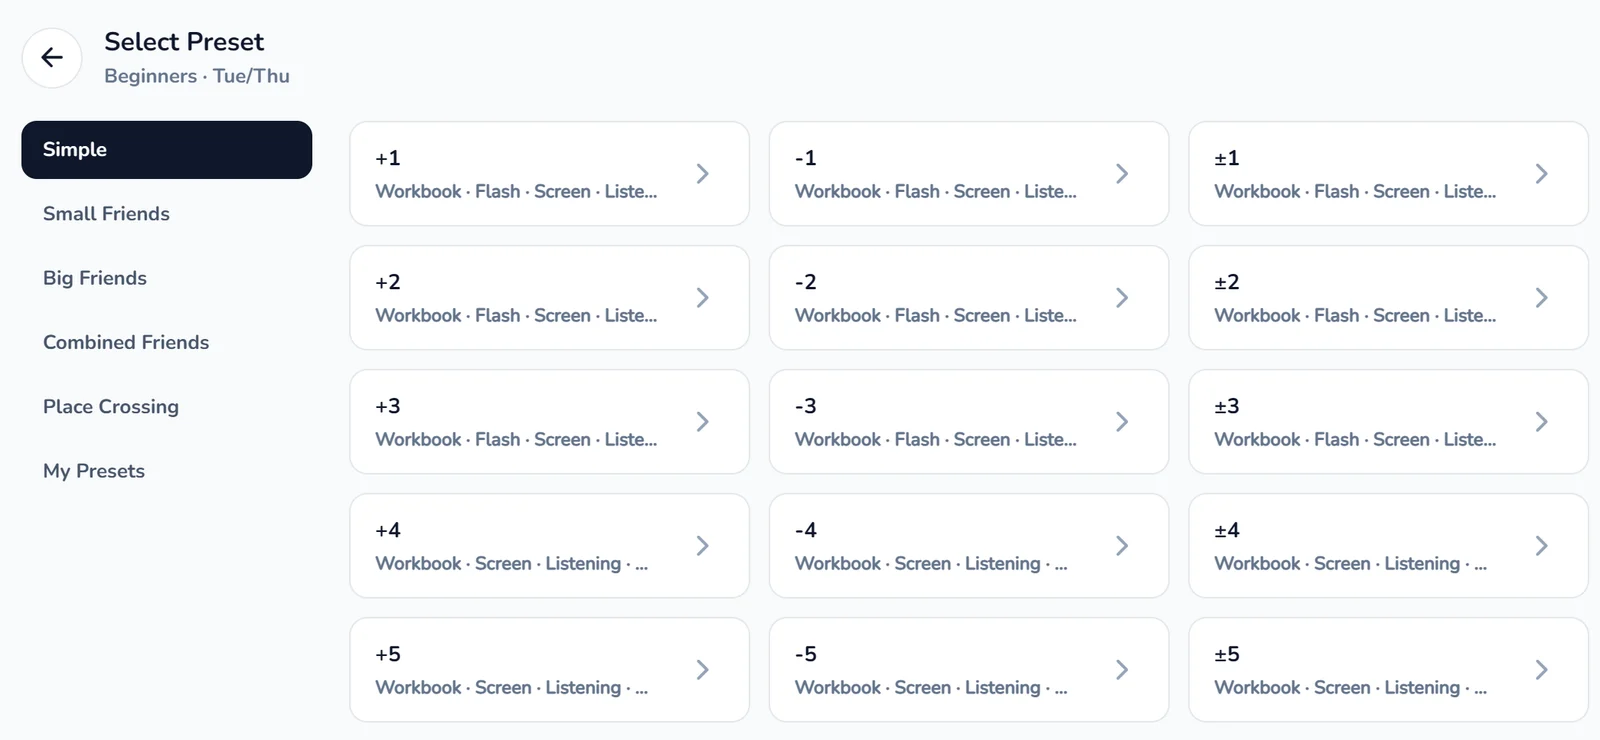
Start with familiar parameters
During the first week, there is no need to experiment with everything at once. Use a topic the child knows. Use familiar speed, digit length, chain length and practice volume.
First create a baseline. Then change one parameter at a time and see what happens.
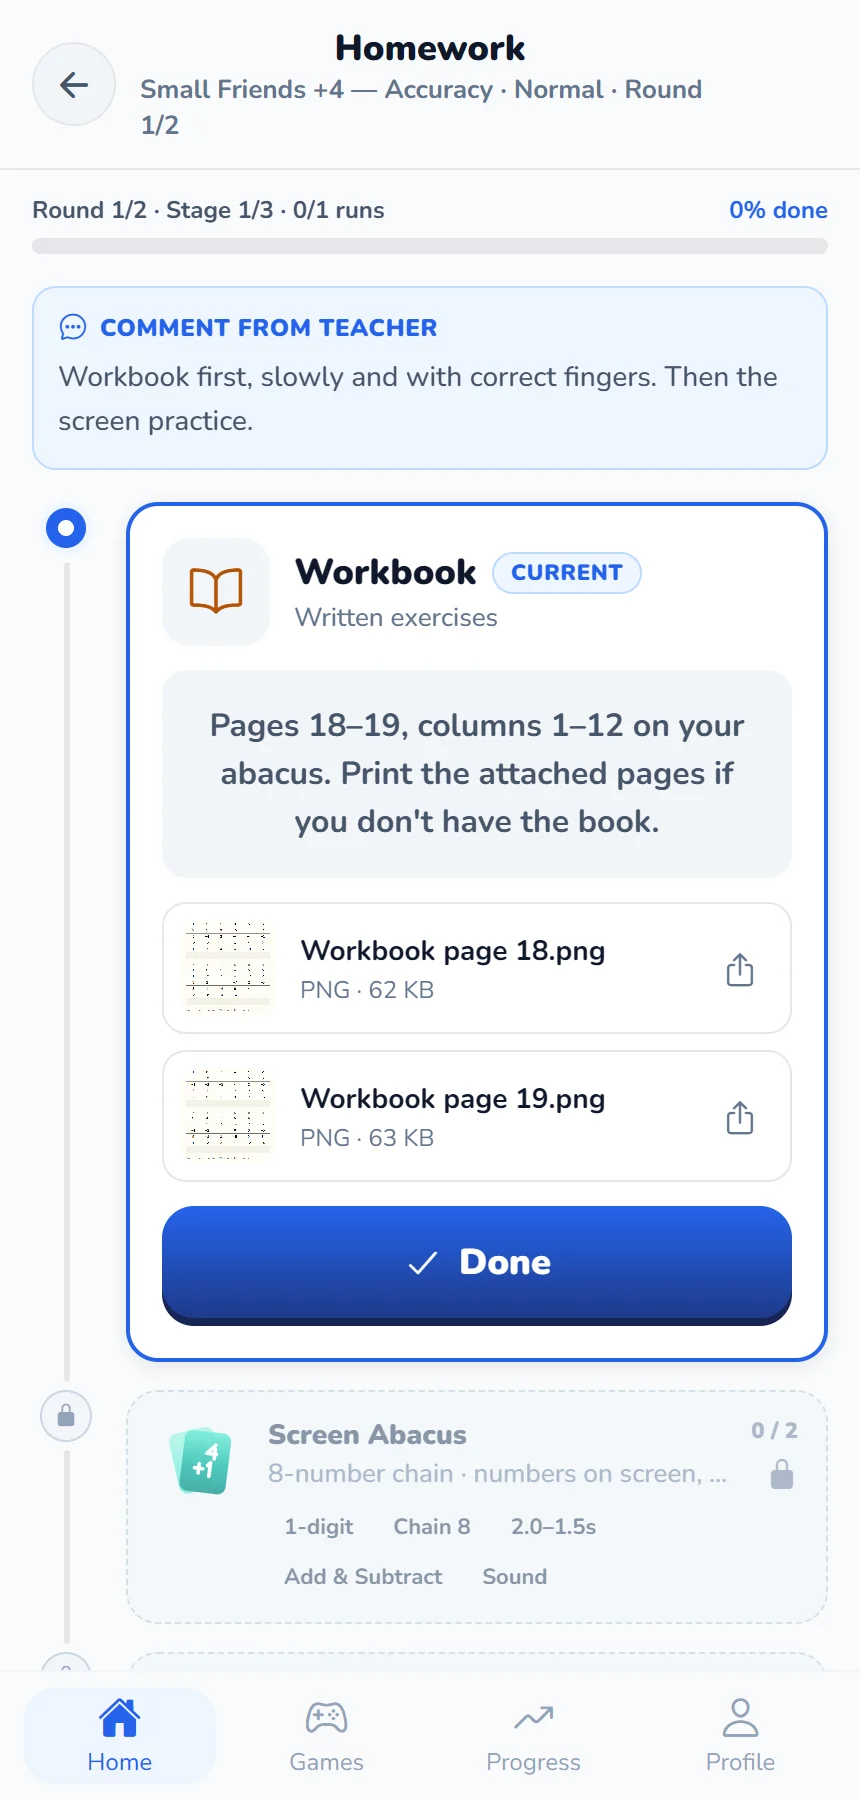
What should the student be able to do after the first setup?
At minimum, the student should be able to:
- enter their profile;
- understand where the assignment is;
- start the practice;
- complete it;
- finish.
If every homework session requires fifteen minutes of parent assistance, the workflow needs to become simpler. Home practice should gradually become more independent.
Day 3: Do not look only at the final percentage
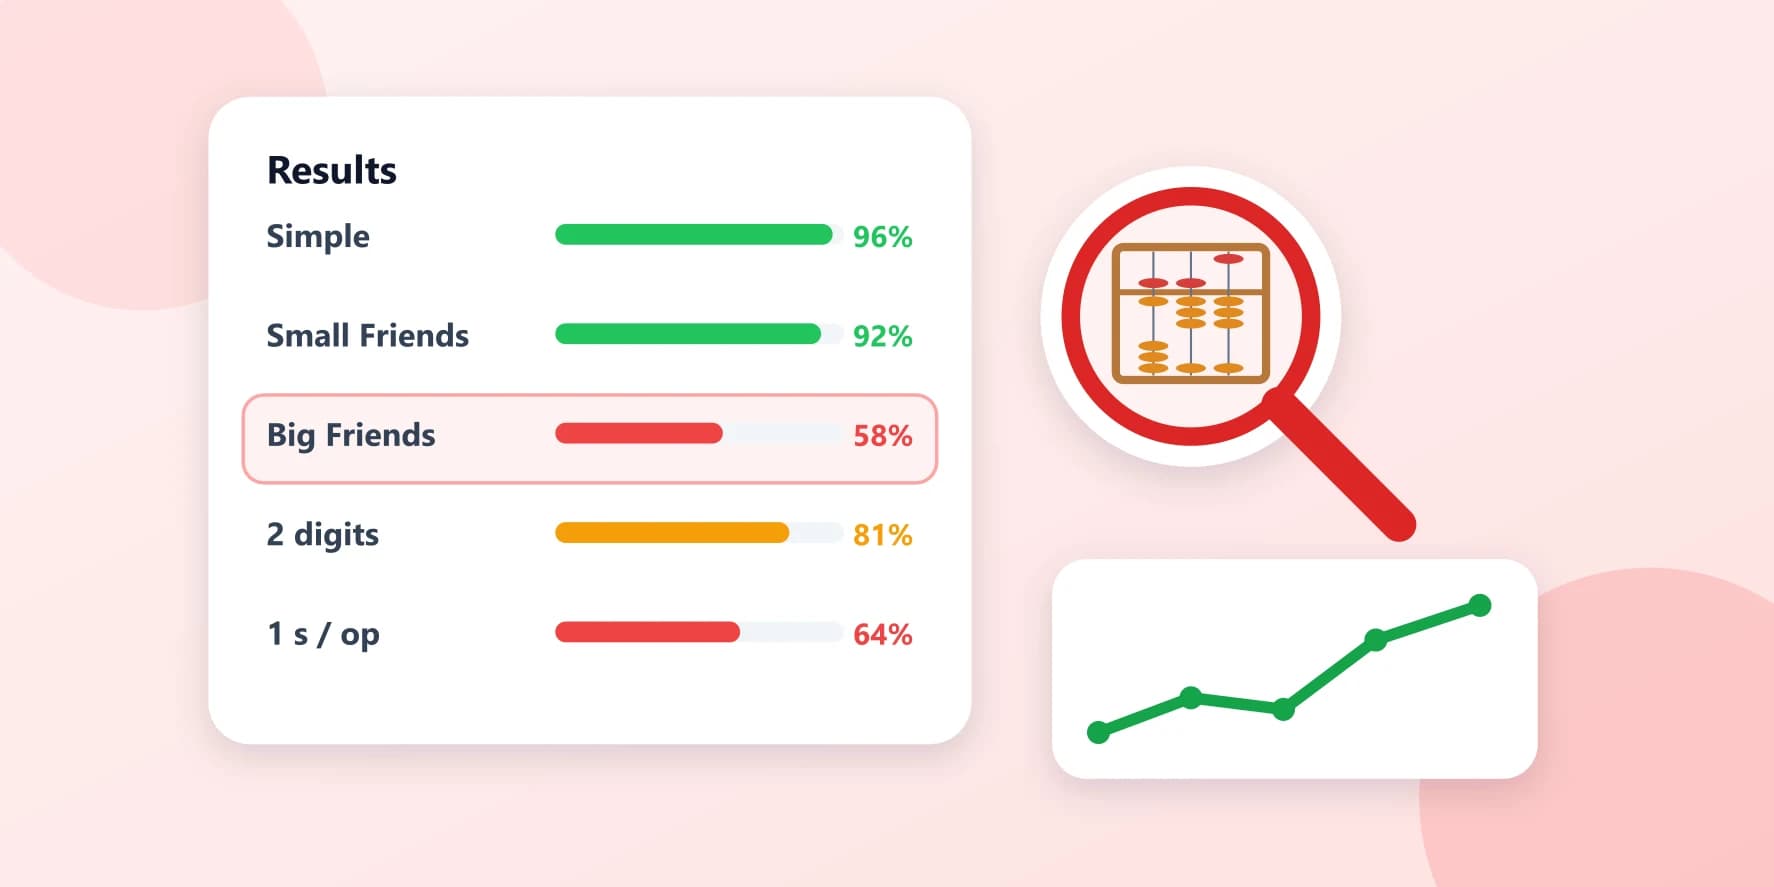
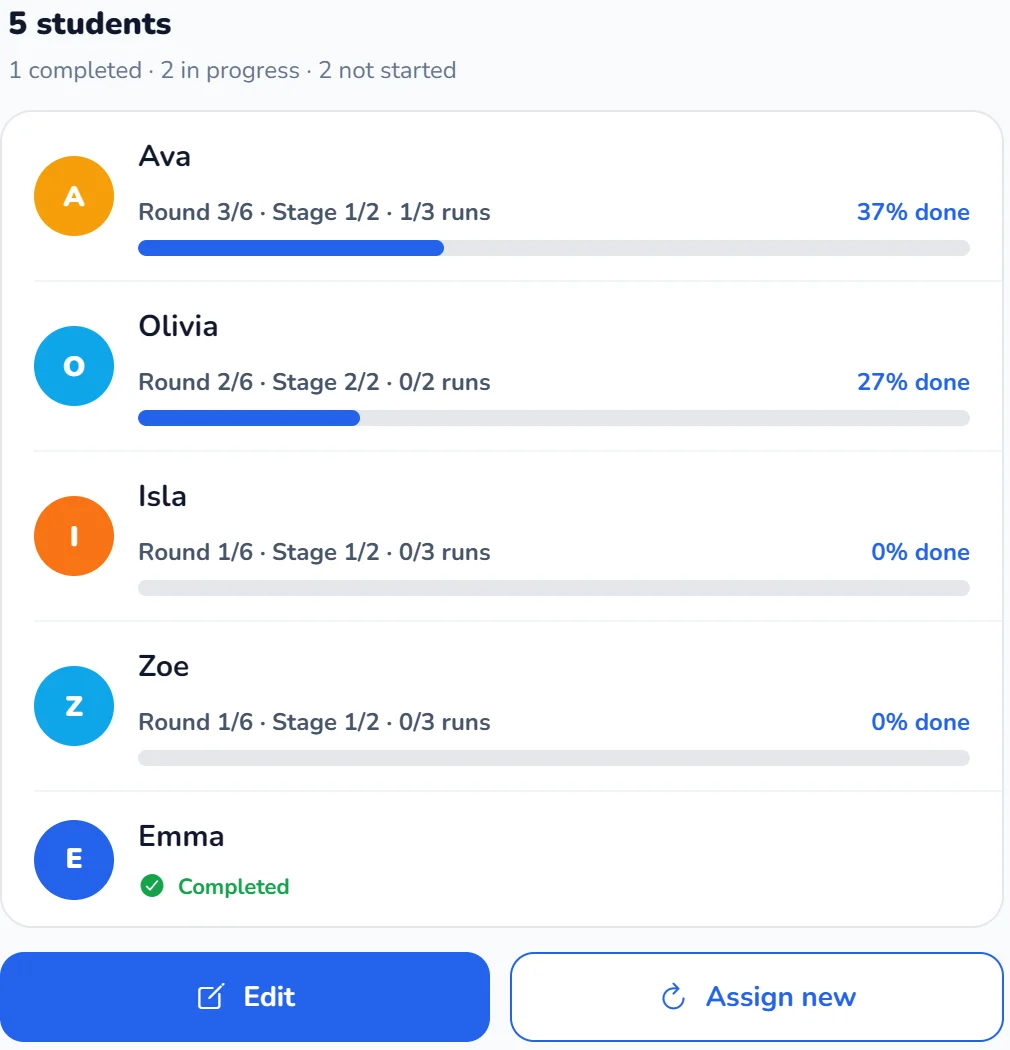
This is where the platform starts becoming genuinely useful. If the student completes the practice, do not stop at “90% — good.” or “70% — bad.”
Look at the context:
- What was the topic?
- What was the speed?
- How much practice was completed?
- Were the same mistakes repeated?
- Does the result match what you see during normal lessons?
A percentage on its own tells you very little. It becomes useful only when you understand the conditions behind it — see how to track student progress.
Compare the digital result with your own teaching observations
For example, you already know that the student understands the topic well, but calculates too slowly. In the homework results, you may see the student move through the stage at a comfortable speed quickly but need many more runs once the speed gets faster. That matches your classroom observation. Good.
Or perhaps the opposite happens. During lessons, the topic looked stable. But at home, the student repeatedly makes the same mistake. That is a signal to check the topic more carefully at the next lesson — the kind of pattern described in why children keep making the same mistakes.
Day 4: Do not change the methodology — adjust the practice
After seeing the first results, it is tempting to immediately give more tasks, increase speed, mix more topics and increase difficulty. Instead, ask one question:
“What exactly do I want to improve?”
If accuracy is weak, speed should probably not increase yet. If accuracy is strong but the student is too slow, timing may become the next variable. If one topic is weak, there may be no reason to increase everything else.
Practice should solve a specific problem.
Change one variable at a time
This is one of the most useful habits when using digital practice. If you change only one thing, it becomes easier to understand the result. For example: same topic; same digit length; same chain; slightly higher speed. If accuracy drops, the reason is easier to interpret.
But if you simultaneously change topic, speed, digit length, chain length and volume — and the result falls, you may not know why.
Controlled progression gives you better information.
If the result is weak, do not automatically increase the amount of work
Imagine the student scores 65%. The first reaction may be:
“I will give twice as many exercises.”
But first, identify the cause. Perhaps the speed is too high; the topic is not stable; the technique needs correction; the student has not practised regularly. More exercises do not automatically solve the real problem.
If the result is high, do not increase everything at once either
A score of 95–100% may mean the student is ready for the next step. But first look at the speed, digit length, chain length, whether the topic was isolated or mixed, and whether the practice was physical or mental.
Sometimes only one parameter needs to change. Not all of them.
Day 5: Add a second student
Only now is it useful to see how the system behaves with two different children. Ideally, choose a student at another level. For example: one beginner; one stronger student. Give them different practice.
This is where one of the main advantages of digital practice becomes clear: a group can follow the same general curriculum without every child receiving exactly the same homework.
Then move to one real group
Once the process works with a few students, move one real class into the system. Not the whole academy. One group. For example: five students; ten students; one regular batch.
Complete the whole weekly cycle: lesson; homework; independent practice; results; next lesson. After this, you will understand much better how Amavit fits into your own routine.
Do not move every existing process at once
If you currently send homework through WhatsApp, do not try to change every group on the first day. Choose one group. Explain the new process to the parents. Test it for one week. Collect questions. Improve the workflow. Then expand.
This is much easier than trying to redesign the whole academy overnight.
During the first week, you do not need every feature
You do not need to master every analytics screen, every practice format, every setting or every advanced feature — the different practice formats can come later. Your first week only needs to answer five questions:
- Can I add a student?
- Can I assign the practice I want?
- Can the student complete it independently?
- Can I see the result?
- Does that result help me make the next teaching decision?
If the answer to those questions is yes, the platform is already doing useful work.
What NOT to do on day one
Move 100 students · study every feature · change your whole methodology · raise speed straight away · change several parameters at once · connect every group
What to do instead
One student · one topic · one real homework task · one result · one teaching decision
Do not change your curriculum just to use the platform
This is especially important for experienced teachers. You may already teach according to your own curriculum, your academy's curriculum, your own Small Friends and Big Friends sequence and your own pacing.
You should not need to abandon that simply because you started using a digital platform. A good tool should support the teacher's methodology. The methodology should not exist to serve the tool.
A platform should support your methodology. Your methodology should not exist to serve the platform.
Test the real teaching workflow
Do not judge the platform only by button colours, menus, how many features appear on the screen or the first five minutes after registration. Test the real cycle:
- Teacher
- Student
- Practice
- Result
- Teacher decision
- Next practice
Not a straight line but a loop: every result leads to the next practice.
This cycle matters much more. Because this is what will repeat every week.
Parents do not need a long manual either
At the beginning, parents usually only need to understand:
- why the child is using the platform;
- how the child accesses it;
- what the child is expected to complete;
- what to do if there is a technical problem.
There is no need to explain the entire analytics system on day one. Parents need to understand their role. The rest can come later.
The most important moment comes after the first assignment
Before the first real assignment, Amavit is simply another platform. After the first assignment, there is a real student, real practice, a real result.
And now the teacher has a real methodological question:
“What should this student do next?”
That is when the platform becomes part of the teaching process.
Your first week is also a test of your workflow
The first week is not only about testing the student. You are also testing the new working system. Ask yourself:
- Is it convenient for me?
- Is it clear for the student?
- Is it clear for parents?
- Am I receiving useful information?
- Does the process save time?
- Does anything still create unnecessary work?
Some parts may feel unfamiliar during the first few attempts. That is normal.
Do not scale confusion
A simple rule: if the process is unclear with one student, it will become harder with five. If it is unclear with five, it will become a problem with fifty. So scale gradually:
one student → a few students → one group → several groups.
This makes implementation much safer.
Do not scale confusion. Start with one student, prove the workflow, then expand.
When can the first week be considered successful?
Not when you have explored every feature. The first week is successful when:
- you added a real student;
- you assigned a real task;
- the student completed it independently or with minimal technical help;
- you reviewed the result;
- you understood the next teaching step.
That is meaningful teacher activation.
The main conclusion
Do not begin your work with Amavit by trying to learn the whole platform. Begin with one real educational cycle.
One teacher. One student. One familiar topic. One homework assignment. One result. One next decision.
Once that cycle is clear, scale gradually: a second student; one full group; several groups; more practice formats; more analytics.
The purpose of Amavit is not to give teachers another complicated dashboard. The purpose is to help organise what good teachers already do every day: teach a child, assign practice, see the result, and make the next methodological decision.
Frequently asked questions
Do I need to move all my students to Amavit at once?
No. It is usually easier to begin with one student or one small group and expand after the workflow becomes familiar.
Do I need to change my mental arithmetic curriculum to use Amavit?
No. The platform should support the methodology and sequence you already use.
What should I test first in Amavit?
Add one real student, assign one familiar practice task, review the result and decide what the student should practise next.
Should I use all Amavit features during the first week?
No. Start with the basic teaching cycle first. Additional formats and analytics can be introduced gradually.
What if a student gets a low score?
Do not automatically assign more exercises. First check the topic, speed, digit length, chain length and whether the task was appropriate for the student.
When should I add an entire group?
After the process works clearly with one or several students and both students and parents understand how to access and complete assignments.
Start small
One student is enough to understand whether the workflow works for you.
Get startedFree for teachers